Track Service Line Profitability by Syncing Your Payroll in Gusto
The payroll pain needs to stop. So many MSPs are spending an absurd amount of time recording payroll entries into the general ledger. Some have a dedicated employee just to run payroll.
The movement to cloud computing for small businesses, specifically Xero and QuickBooks Online (QBO), means formerly manual processes, such as recording payroll journal entries, are completely automated. This means huge savings for companies who are unnecessarily paying employees to do totally automatable processes.
While some companies have integrated the link between their payroll company and their GL, most who have are still using one GL mapping for all employee costs. This means salaries, payroll taxes and benefits for all employees go to the same line on the P&L. Simple and effective but it doesn’t follow the best practices in the industry.
Best practices in the MSP industry are to allocate different employees’ cost according to their function. Client-facing employees’ payroll expenses are included in cost of goods sold. Management, administration and finance are expensed.
This breakdown by function has meant intense pain for management as they parse payroll by employee or department into the P&L at month-end or before quarterly calls using incredibly detailed spreadsheets to allocate costs among departments.
It all ends today.
This post is a detailed how-to post showing the integration of employee costs by department using Gusto payroll and QuickBooks Online.
Enable classes in QuickBooks to talk to Gusto’s departments.
In QBO, navigate to the settings (gear icon), and open the company settings. In the company main company screen, and you will turn on the track classes. Leave the checkbox that says “Warn me when a transaction isn’t assigned a class” unchecked.
![]()
Now that classes are turned on, define what your classes are going to be. For the purposes of this post, the classes here are the departments your current employees integrate into. Add each of the departments as a class exactly as you will enter them into Gusto. Here’s an example of how it may look.
Now that QBO is set up, enable Gusto to sync by department.
The next steps are going to organize Gusto to talk to the classes in QBO. Gusto will allow you to sort by job, department or project for QBO but the language does not line up exactly with the “class” term QBO is using.
In Gusto, navigate to Settings > Preferences and Enable Departments.
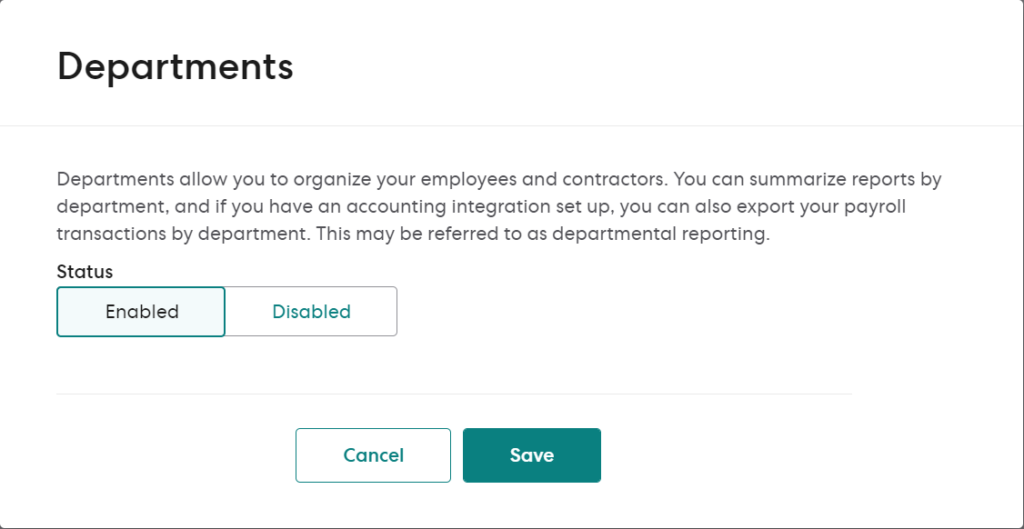
Once this has been enabled, you are able to manage the specific app setting in QBO. Navigate to App directory > Settings and enable departments.

Now that you have enabled both departments in Settings and App directory, you can add the specific departments into Gusto. Here you will add each department exactly as you added them in QBO. The names should be identical.
Once they are added, they can be linked.
Since the names are the same, you can easily map the department to the QBO class.
Allocate all employees into a department.
Now that the departments are created, navigate to People and assign each employee a department. Only after an employee is assigned a department will the Department Account Mapping become available.
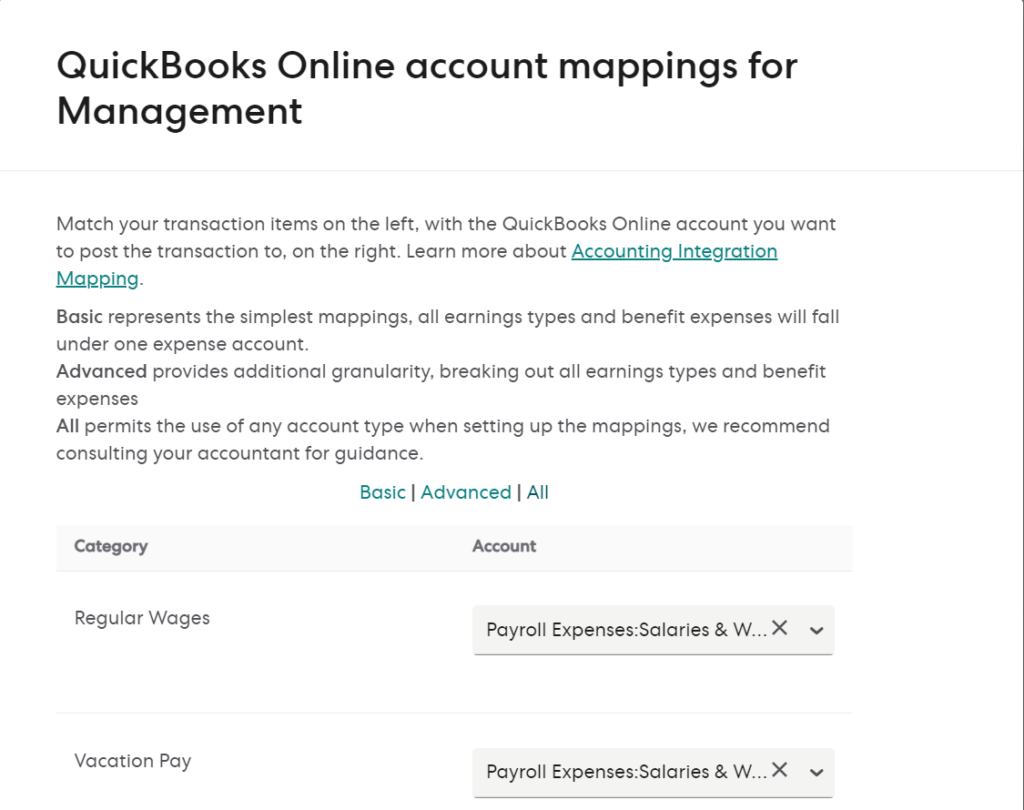
With each department mapped to the associated class in QBO, create a customized expense entry for each department.
All the expenses and COGS accounts can now be mapped by department. The COGS Labor can be directly added to the P&L for the appropriate department. While non-client facing departments can be added to the expense account. Take your time to map out each department placing the full cost of benefits, taxes and salaries into the proper GL account.
Repeat this process for all departments. Upon completing this section, a payroll run will be synced to QBO and the costs will show up in the exact GL account for each department.
But wait! Not all employees are dedicated resources. How do I split among multiple departments?
This simple and clean presentation and mapping does not match the reality of shared resources. Some resources are shared between client facing and management or administrative roles. Gusto does not allow for employees or departments to be split. Correctly mapping these shared resources involves a workaround in QBO.
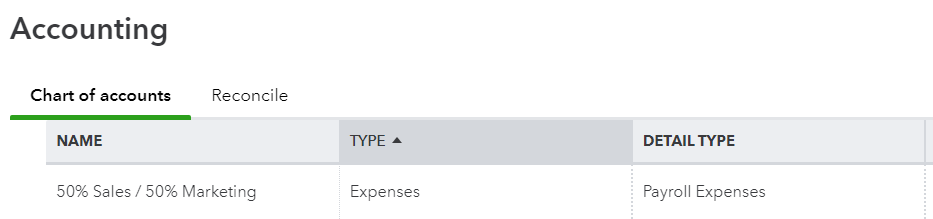
The workaround involves creating a GL account in QBO for a specific allocation of a department. You may have noticed in the screenshot above, I included a department for “50% Sales / 50% Marketing”. This shared department will map into one GL account by the same name. Add a GL account with the same name as the class and department.
When you map the payroll expenses of this account by department, point them at this account. At the end of the month, the only required step is to record a journal entry to allocate the costs between the ratio reflected by the GL account name.
Resist the tendency to go crazy on shared resources.
You are a detailed individual. Everything about your job requires serious attention to detail. When people first start mapping their employees’ time, they tend to go overboard.
Resist the urge.
I recommend only one to four shared resource general ledger accounts (that also have an associated class and department in QBO and Gusto respectively). Take baby steps into tracking profitability.
You can finally get quality information without spending hours mapping everyone’s salary, payroll taxes, and benefits.
The primary benefit of cloud accounting is efficiency. The native cloud software of Gusto and QBO provides a link to allow your company to see the costs by department without the hassle of another spreadsheet.
You can now access profitability by service line by mapping each department to the correct GL account, something that previously required great pain.
Don’t have Gusto payroll? You can check it out here:
![]()